Category Archives: CSSonly

zoom plastic letter toy

CSS Only Animation: Zoom on Hover

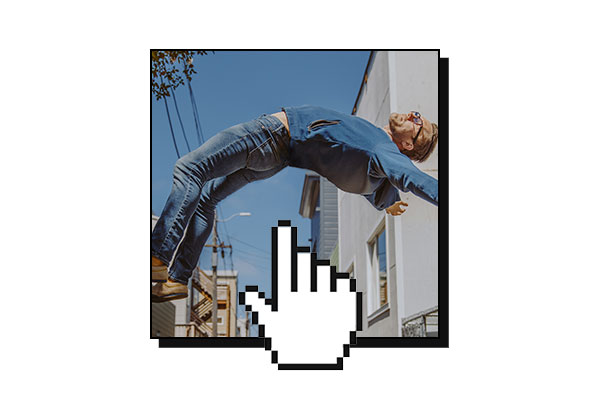
In today’s quick tip, we’ll dive into creating a dynamic ‘zoom on hover’ effect that adds an interactive touch to images on your web pages. By incorporating the provided CSS, your images will elegantly scale up when hovered over. This effect, achieved with minimal code, is a fantastic way to enhance your website’s visual appeal and engage your visitors.

DEMO: Zoom on Hover

HTML

<img class="zoom-in" src="YOUR-IMAGE-PATH"/>

CSS

.zoom-in { transition:transform .2s; }
.zoom-in:hover { transform: scale(1.2); }
Abstract background with swap icon

CSS Only Animation: Image Swapping on Hover (Logo Swap)

Explore how to enhance your website’s interactivity with this simple guide on implementing a logo or image swap effect upon mouse hover. Ideal for web designers and developers, this tutorial includes step-by-step instructions, complete with HTML and CSS code snippets, to seamlessly integrate this dynamic visual cue into your web project. Perfect for adding that extra flair to logos or images on your site, learn how to create a more engaging user experience with ease.

DEMO: Swapping Logo/Image on Hover of Mouse

my-first-logomy-second-logo

HTML

<div class="swap">
	<a href="https://wedesignorange.com">
		<img class="main" src="YOUR-MAIN-IMAGE" />
		<img class="hover" src="YOUR-SWAPPING-IMAGE" />
	</a>
</div>

CSS

.swap { height: 200px; width: 200px; position: relative; }
.swap img {
	position: absolute;
	top: 0;
	right: 0;
	left: 0;
	bottom: 0;
	transition: opacity .9s;
	width: 100%;
	height: 100%;
	object-fit: contain;
}
.swap img.hover, .swap:hover img.main { opacity:0; }
.swap img.hover:hover { opacity:1; }
image scrolling

CSS Animation: Image Scrolling on Hover

In the ever-evolving world of web design, adding interactive and visually appealing elements to your website can greatly enhance the user experience. One exciting way to achieve this is by learning how to create an image scrolling effect on hover with CSS animation. With just a few lines of code, you can transform a static image into an engaging and dynamic component that draws the viewer’s attention. So, let’s dive in and discover how to make your website come to life with CSS image scrolling on hover!

DEMO: Mouse over to see the scrolling animation

sleekycase.com website

HTML

<div class="container"> 
	<img src="YOUR-IMAGE"> 
</div>

CSS

img { 
	object-fit: cover;
	object-position: top;
	transition: ease-in-out 4s;
	width: 450px;
	height: 300px;
}
img:hover {
	object-position: bottom;
}
stop sign

How to Add Deny Access to the .htaccess File

The .htaccess file is an important configuration file for websites that use the Apache web server. It allows you to control various aspects of your website, such as redirections, password protection, and caching. However, because the .htaccess file is so powerful, it is also a target for hackers and other malicious actors who may try to exploit it to gain access to your website or server.

One way to protect your .htaccess file is to add a “deny from all” rule to it. This will prevent anyone from accessing the file directly, including hackers who may be trying to modify it.

Here’s how to add a deny access rule to your .htaccess file:

1. Access your website’s .htaccess file

First, you’ll need to access your website’s .htaccess file. You can do this by connecting to your website’s server via FTP or SSH, and navigating to the directory where your website’s files are stored. The .htaccess file should be located in the root directory of your website.

2. Add the deny access rule

Next, open the .htaccess file in a text editor and add the following line at the top of the file:

#deny access to .htaccess
<Files .htaccess>
Order allow,deny
Deny from all
</Files>

This rule specifies that access to the .htaccess file should be denied for all users.

3. Save the changes

Save the changes to your .htaccess file and upload it back to your website’s server.

By adding a deny access rule to your .htaccess file, you can help protect your website from malicious attacks and unauthorized access. However, it’s important to remember that this is just one of many security measures that you should take to protect your website. Be sure to keep your software and plugins up-to-date, use strong passwords, and implement other security best practices to keep your website secure.

Hamburger Menu Icon

HTML-CSS-JS: Simple Hamburger Menu Expandable

“How to create an expandable hamburger menu?”

DEMO: How It Looks

HTML

<header class="header">
  <div class="header__menu menu">
    <div class="menu__icon"> <span></span> </div>
    <nav class="menu__body">
      <ul class="menu__list">
        <li> <a data-goto="#home" href="" class="menu__link">Home</a></li>
        <li> <a data-goto="#section-1" href="" class="menu__link">Section 1</a></li>
        <li> <a data-goto="#section-2" href="" class="menu__link">Section 2</a></li>
        <li> <a data-goto="#section-3" href="" class="menu__link">Section 3</a></li>
      </ul>
    </nav>
  </div>
</header>

CSS

body {
	background-color: black; font-family:sans-serif; 
}
header a {
	color: #111 !important;
	text-decoration: none!important;
	font-weight: 200;
	font-size: 2.2rem;
	line-height: 1.2;
	display: block;
}
.header__menu {
	position: fixed;
	top: 34px;
	right: 30px;
	z-index: 10;
}
.menu__icon {
	z-index: 5;
	display: block;
	position: relative;
	width: 50px;
	height: 22px;
	cursor: pointer;
}
.menu__icon span, .menu__icon::before, .menu__icon::after {
	left: 0;
	position: absolute;
	height: 20%;
	width: 100%;
	transition: all 0.3s ease 0s;
	background-color: white;
}
.menu__icon::before, .menu__icon::after {
	content: '';
}
.menu__icon::before {
	top: 0;
}
.menu__icon::after {
	bottom: 0;
}
.menu__icon span {
	top: 50%;
	transform: scale(1) translate(0, -50%);
}
.menu__icon._active span {
	transform: scale(0) translate(0, -50%);
}
.menu__icon._active::before {
	top: 50%;
	transform: rotate(-45deg) translate(0, -50%);
}
.menu__icon._active::after {
	bottom: 50%;
	transform: rotate(45deg) translate(0, 50%);
}
.menu__body {
	position: fixed;
	top: 0;
	right: -99%;
	width: 34%;
	height: 100%;
	background-color: rgba(255, 255, 255, 0.8);
	padding: 100px 30px 30px 30px;
	transition: right 0.3s ease 0s;
	overflow: auto;
}
.menu__body._active {
	right: 0;
}
.menu__list > li {
	flex-wrap: wrap;
	margin-bottom: 30px;
}
.menu__body ul {
	padding-left: 1rem;
	list-style: none;
}

JavaScript

Link the below external Javascript into the bottom of your HTML.

<script type="text/javascript" src="https://blog.identitydesign.us/js/hamburger.js"></script>

With having the hamburger menu on your navigation, your website could look more sophisticated and clean.

Box Pop-up Effect

CSS: Button Push Shadow Effect on Hover

“How to create a shadow effect when hovering on a box?”

DEMO: How It Looks

TRY HOVERING OVER THE BOX!

HTML

<div class="">TRY HOVERING OVER THE BOX!</div> 

CSS

.button-pop {
    border: 2px solid black;
    padding: 1rem; 
    width:200px;
    height:200px;
}
.button-pop:hover {
    position: relative;
    right: 5px;
    bottom: 5px;
    box-shadow: 7px 7px #111;
}

It’s pretty simple. Enjoy coding!

Font face

CSS: Use your desktop fonts to your website

“How to use .OTF (or other desktop) fonts to your website?”

If you would like to use your desktop fonts to your website, do this!

CSS

  1. Select and place fonts to the server.
  2. Copy and paste codes below to your stylesheet.
  3. Replace font-family: ‘FONT1‘ on both @font-face and p with your own font name.
  4. You may change normal to bold if necessary.
@font-face {
	font-family: 'FONT1';
	src: url("../fonts/YOUR-FONT-LOCATION.otf") format("opentype");
	font-weight: normal;
	font-style: normal;
}
p { 
	font-family: 'FONT1', sans-serif; 
}
YARPP Sidebar

YARPP for WordPress: How to remove the “You May Also Like” header on the sidebar widget area

YARPP (Yet Another Related Posts Plugin) is one of the greatest plugins in WordPress that provides related posts automatically using an algorithm, but there are a few things that can’t be easily fixed through its settings.

How to remove the “You May Also Like” header on the sidebar widget YARPP Plugin for WordPress?

I’ve tried many options in the settings, but they didn’t seem to work. Try using the CSS code below to remove it easily.

CSS

Copy the code below and paste it into your CSS document.

.yarpp-related-widget h3 { display:none; }

Tada!

YARPP posts

How to remove the “Related Posts” on YARPP Plugin for WordPress

YARPP(Yet Another Related Posts Plugin) is a one of the greatest plugins in WordPress that provides related posts automatically with algorithm, but there are a few things can’t be easily fixable on its setting.

How to remove the “Related Posts” on YARPP?

I’ve tried many options on their settings to remove the Related Posts on the bottom of a page, but it seems not working. Try below CSS line to remove it with ease.

CSS

Copy the code below and paste into your CSS document.

.yarpp-related-website { display:none; }

Tada!

WooCommerce Astra: How to Disable Cart Bubble on Hover of the Cart Menu

I’ve been searching how to remove/hide the cart bubble on hover of the cart icon on header in Astra / WooCommerce combination.

This can’t be modified via Appearance -> Customize setting. Instead, I was able to hide the element with a simple CSS line as below:

.ast-site-header-cart:hover .widget_shopping_cart, .woocommerce .ast-site-header-cart:hover .widget_shopping_cart{ display:none; }

Feel free to comment me if this doesn’t work for you.

Youtube Thumbnail

CSS: Make Perfect Responsive YouTube Embedded Iframed Videos

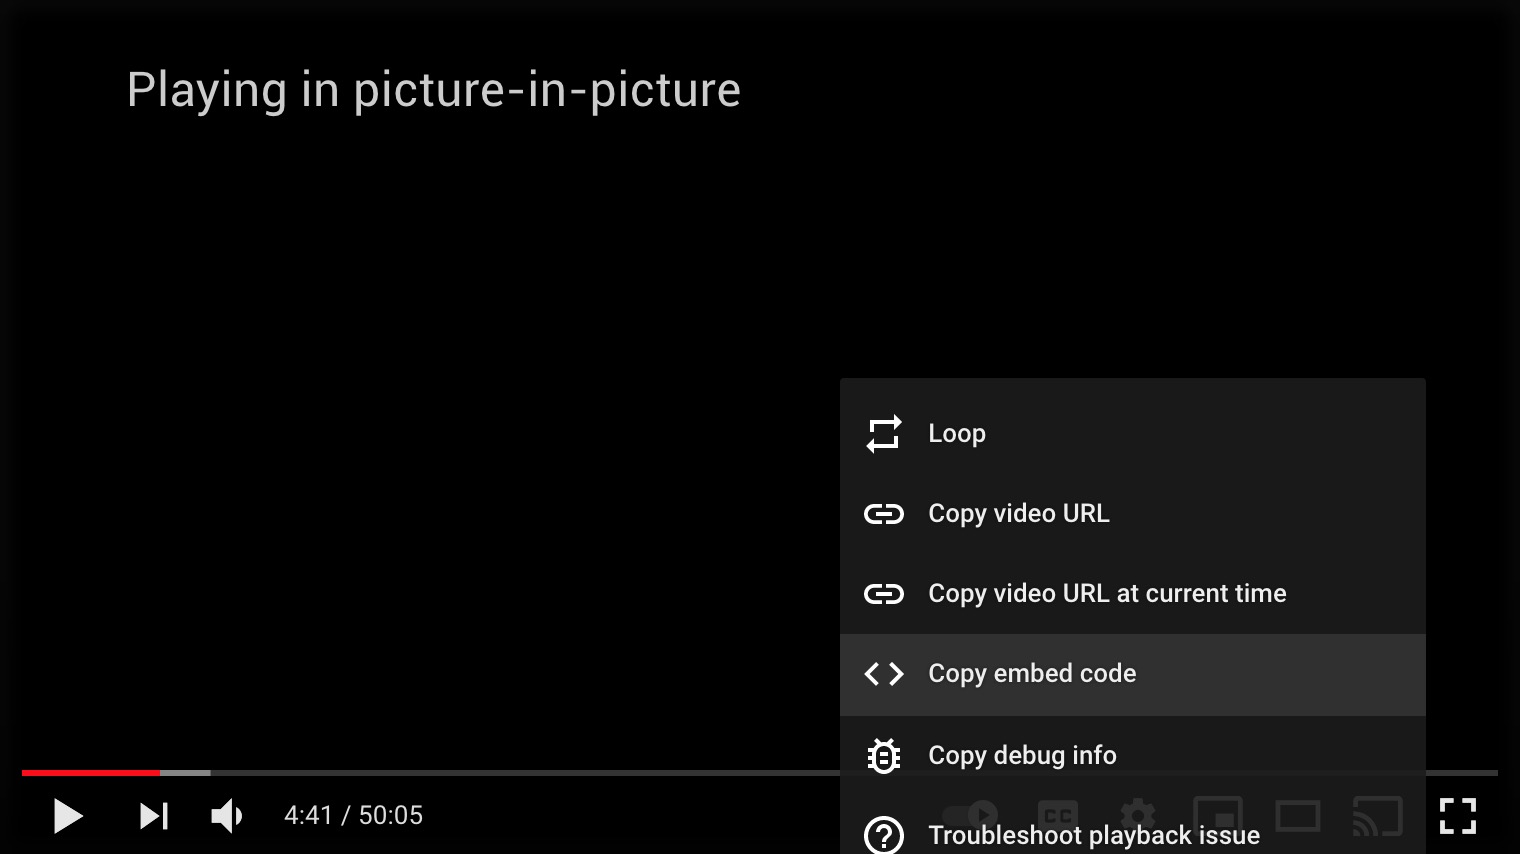
YouTubes are great way to embed videos for websites, and it’s really easy to get code to place on your website. Right-click on the video you wish to embed, select “Copy embed code” from the drop-down menus. Paste the code into the HTML fields and BAM! your video just added to the page.

The video might look great with your desktop screen, but depends on your device screens sizes with dimensions, the video might have black empty spaces on top and bottom of the videos. How do I fix this?

Make Youtube Video Responsive for All Screen Sizes without Leaving Black Areas

Add a wrap .iframe-wrap around the iframe code you embedded.

HTML

<div class="iframe-wrap">
  <iframe width="708" height="398" src="https://www.youtube.com/embed/c9RzZpV460k" title="YouTube video player" frameborder="0" allow="accelerometer; autoplay; clipboard-write; encrypted-media; gyroscope; picture-in-picture" allowfullscreen></iframe>
</div>

CSS

Copy the code below and paste into your CSS document.

.iframe-wrap {
    position: relative;
    padding-bottom: 50%; /**YOU MIGHT HAVE TO ADJUST TO FIT PERFECTLY**/
}
iframe {
    position: absolute;
    width: 100%
    height: 100%;
}

As commented in the .iframe-wrap, you might have to adjust to fit perfectly. It normally fits well between 50% to 60%. Enjoy coding!

Crayons with different height

CSS: Crop Image Width or Height with CSS Only

Images can be cropped with a couple of CSS lines without using Photoshop or any image editing tools. This is useful when your multiple column thumbnail image height is different like below.

BEFORE

thumbnail image before

Because of the uneven height of the thumbnails the entire structure could be easily broken.

CSS

Copy the code below and paste into your CSS document.

img {
    height: 200px;
    object-fit: cover;
}

Try object-position: 10% 10%; if you want to move around the position of the image within the area.

AFTER

thumbnail image after

All 20-30 of your thumbnails will fit perfectly, and your layout won’t look wonky again. This method could be used on any single image on your webpage.

Remove P tags

Use CSS to remove auto-generated empty <p> tags in WordPress

Can’t complain the great convenient functionality of auto-generating <p> tag in WordPress, but sometimes it’s pretty annoying as it breaks some lines unintentionally. Here’s how to remove only empty <p> tag with a simple CSS line.

CSS: Hide/Remove Empty <p> tags

p:empty {
  display: none;
}
Bootstrap TIme Interval

Bootstrap Uneven Column Heights Issue in Layout Grid System

Bootstrap columns could go wrong and look uneven when columns have different heights. Use float: left to clear out the float properties and to stack blocks to the closest side.

.col-lg-3:nth-child(5n) { clear: left; }

If you have multiple blocks (for instance, 4-column layout) use float: left pseudo-element to apply the class every 5th element 5n.

Load Page Pop-Up Thumb

CSS Only: Pop-up Modal Lightbox on Page Load

I’ve shared a way to add a pop-up or modal lightbox with CSS only on my earlier post, Easy Modal Lightbox Pop-Up. I’ve received many request how to make this modal pop up on page load instead of using a button. So, here’s how-to:

HTML

Copy the code below and paste into your HTML document.

<div id="modal-1" class="modal animate-opacity">
   <div class="modal-content">
      <div class="modal-inner">
         <span onclick="document.getElementById('modal-1').style.display='none'" class="modal-close">&times;</span>
         <h4>Modal Headline</h4>
         <p>Modal description goes here.</p>
      </div> 
   </div>
</div>

CSS

Copy the code below and paste into your CSS document.

.modal {
	z-index: 10;
	display: block;
	padding-top: 100px;
	position: fixed;
	left: 0;
	top: 0;
	width: 100%;
	height: 100%;
	overflow: auto;
	background-color: rgb(0,0,0);
	background-color: rgba(0,0,0,0.5)
}
.modal-content {
	margin: auto;
	background-color: #fff;
	position: relative;
	padding: 0;
	outline: 0;
	max-width: 600px
}
.modal-inner { padding: 20px 30px; }
.modal-close {
	-webkit-touch-callout: none;
	-webkit-user-select: none;
	-khtml-user-select: none;
	-moz-user-select: none;
	-ms-user-select: none;
	user-select: none;
	position: absolute;
	right: 0;
	top: 0;
	background: #ccc;
	padding: 6px 10px;
}
.animate-opacity { animation: opac 0.8s }@keyframes opac{from{opacity:0} to{opacity:1}}

.animate-opacity is optional as it’s the animated effect when modal opens.

You can tweak the animation time. It’s currently 0.8 seconds opac 0.8s , but change the timing as your need.

Thumbnail Reviews

Star Rating Symbol Icons Show Broken or Square Boxes on Woocommerce Review

Very strange? I just made the reviews functionality active on my WordPress Woocommerce website, and I see the icons are broken with square boxes (some says “SSSSS”). There should be some CSS conflicts where the icon fonts were not properly loaded. So, I’ve came up overwriting some CSS styling including a new font-family to the page, and it’s working!

p.stars a:before, p.stars a:hover, p.stars a:visited, p.stars a:focus, p.stars a:hover~a:before, p.stars:hover a:before, p.stars.selected a:not(.active):before, p.stars.selected a.active:before, p.stars.selected a.active~a:before {
    font-family: 'star';
    content: '';
    line-height: 1.4 !important;
}
Storefront Thumb

Remove ‘Built with Storefront & WooCommerce’ with CSS lines on WordPress Storefront Theme

Woocommerce offers one of a greatest E-Commerce template themes for free called, “Storefront“. From the Nav to checkout process, all required functionality in order to run an E-Commerce are ready for you to download and activate. But, one little thing is bugging at the bottom of the page, “Built with Storefront & WooCommerce.” line, however, it’s possible to get it out with a few lines of CSS.

Store front copyright

Remove and replace copyright information on Storefront theme

footer .site-infos { display:none; } 				
footer .footer-widgets { border: 0 !important;	}	
footer .footer-widgets::after {  content: "© ADD THIS FOR YOUR COPYRIGHT INFO" }
CSS Gradient

CSS: Add Gradient (Dark Shade) Layer on Background Images to Make the Text Visible

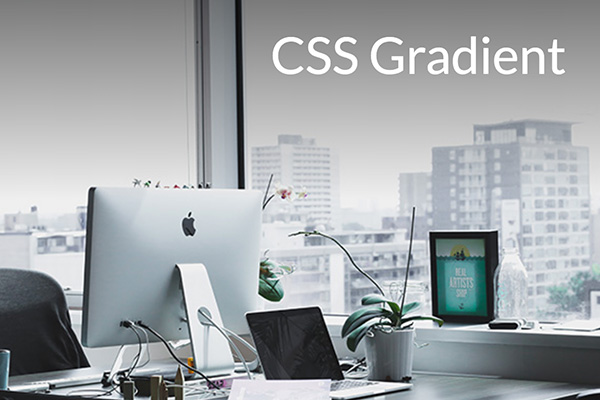
Sometimes the text or caption is not legible on an image depends on the color contrast between the foreground element and the background. I used to edit my image to be more darker or lighter to make the HTML text stand out and readable to users, but well, here’s must easier solution with lines of CSS!

Original

CSS Gradient

HTML

Copy the code below and paste into your HTML document.

<div class="hero-outer">
    <div class="hero-inner">
        <p>CSS Gradient</p>
    </div>
</div>

CSS

Copy the code below and paste into your CSS document.

.hero-outer { position:relative; }
.hero-inner::after {
    content: '';
    position: absolute;
    top: 0;
    left: 0;
    width: 100%;
    height: 50%;
    background-image: linear-gradient(to bottom, #000, transparent);
    opacity: 0.5;
}
.hero-inner { 
    background: url('https://blog.identitydesign.us/wp-content/uploads/2019/10/300x200-gradient-1.jpg'); 
    width:100%;
    height: 400px;
    background-size:cover;
}
.hero-inner p { 
    color:#fff; 
    position:relative; 
    font-size: 50px !important; 
    padding-right: 40px;
    text-align: right;
    top: 20px;
    z-index: 1;
}

Add a Copyright Text / Info Using CSS on WordPress Websites

Let’s don’t bother spending hours to look for footer.php or widgets in WordPress to add your Copyright line on the footer of website. Here’s one easy method to add using CSS.
copyright

Add copyright text / info with CSS for WordPress/Bootstrap websites

footer > div:before {
    content: "© Copyright (YEAR). All rights reserved.";
    font-size: 14px;
    color: #777;
    text-align: center;
    display: block;
    margin: 20px auto;
}

How to Remove “Bootstrap WordPress Theme” on WP Bootstrap Starter Template

Get Custom Phone Case Now!

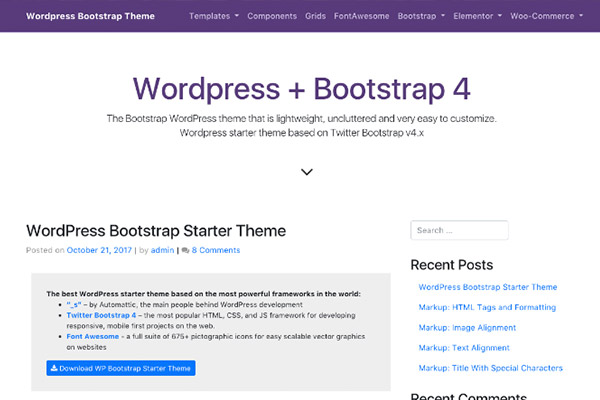
WP Bootstrap Starter Theme is one of a popular templates you can get it for free in WordPress. It’s nice with light weighted built in Boostrap 4 framework so it’s ready to use just by having the theme itself.

You can pretty much edit the entire website including the header and footer except for removing the copyright text very bottom of the page saying, “Bootstrap WordPress Theme”.

Screen Shot 2019-05-31 at 4.59.42 PM

Here’s a way to make it disappear by adding a CSS line. Let me show you how to do this in a minute!

Remove “Bootstrap WordPress Theme” text on the footer

  1. Go to the Admin website -> Appearance -> Customize -> Additional CSS
  2. Copy the CSS code below and paste on the CSS window.
  3. Save!
footer .sep, footer .credits {
    display:none;
}
Absolute centering

CSS / HTML: Make Absolute Center (Vertical & Horizontal)

For some reasons, making an article absolute center was pretty tricky with HTML.

Horizontal centering is mostly done by text-align:center or margin:auto tags in css. Vertical alignment has to do with positions or vertical-align:middle, and many times an image or other elements are not centering correctly.

Try this below, this is one easy way making your content elements absolute center in vertical and horizontal.

DEMO: Vertical & Horizontal Absolute Centering

Hello.
Your centered content is here!

CSS

Copy the code below and paste into your CSS document.

body {
	display: flex;
	justify-content: center;
	align-items: center;
        text-align:center;
}

Easy and fantastic!

Pop up thumbnail

CSS Only: Easy Modal Lightbox Pop-up (Animated)

Now you can add pop-ups or modal lightbox with CSS only (and really minor single line of JavaScript) on your html, wordpress or bootstrap website, so don’t be afraid.

DEMO: CSS Modal Lightbox

HTML

Copy the code below and paste into your HTML document.

<button onclick="document.getElementById('modal-1').style.display='block'">Click Here</button>

<div id="modal-1" class="modal animate-opacity">
   <div class="modal-content">
      <div class="modal-inner">
         <span onclick="document.getElementById('modal-1').style.display='none'" class="modal-close">&times;</span>
         <h4>Modal Headline</h4>
         <p>Modal description goes here.</p>
      </div> 
   </div>
</div>

You can add multiple modals. Copy the entire codes and replace all modal-1 into modal-2 and modal-3

CSS

Copy the code below and paste into your CSS document.

.modal {
	z-index: 10;
	display: none;
	padding-top: 100px;
	position: fixed;
	left: 0;
	top: 0;
	width: 100%;
	height: 100%;
	overflow: auto;
	background-color: rgb(0,0,0);
	background-color: rgba(0,0,0,0.5)
}
.modal-content {
	margin: auto;
	background-color: #fff;
	position: relative;
	padding: 0;
	outline: 0;
	max-width: 600px
}
.modal-inner { padding: 20px 30px; }
.modal-close {
	-webkit-touch-callout: none;
	-webkit-user-select: none;
	-khtml-user-select: none;
	-moz-user-select: none;
	-ms-user-select: none;
	user-select: none;
	position: absolute;
	right: 0;
	top: 0;
	background: #ccc;
	padding: 6px 10px;
}
.animate-opacity { animation: opac 0.8s }@keyframes opac{from{opacity:0} to{opacity:1}}

These 4 classes would do the job, and the last class, .animate-opacity is the animated effect when modal opens (so it’s optional).

You can tweak the animation time slower or faster by changing the speed time. It’s currently 0.8 seconds, opac 0.8s, but change it as you need it. Have fun!