My new client just called me with an urgent voice, “My email is down. Please fix this as soon as possible.”
My client requested me to build his website, so I set up his old domain name to my hosting server for the work environment, and his email stopped working. He never mentioned about the email that was under his old domain (i.e. client@domain.com). I was in panic for a few minutes, but gladly, I was able to find out that his email is linked to G-Suite (now called Google Workspace).
Here I will show you how to change DNS setting for an email or entire emails under your own unique domain (i.e. you@yourowndomain.com). This setup can be found under your domain provider setup tab, and it’s usually called “Advanced DNS” or “Manage DNS”. Sometimes this can be called “Zone Editor” on your hosting provider setup tab, and this can be modified if your domain is linked to a hosting service.
Clear / Remove MX Record on your DNS
First, you need to see the existence of any MX Record (Mail Exchange records). If you find a single MX Record that are exist on your DNS, remove it.
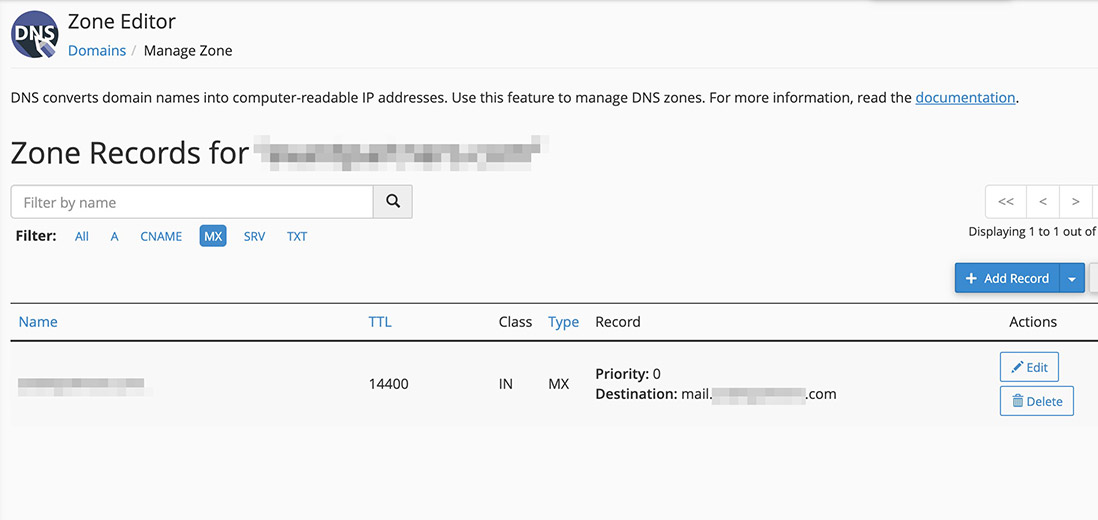
I removed a MX Record “Priority:0 with “mail.MYDOMAIN.com” from my cPanel. Make sure that is no MX Record on you DNS.
Add Google Workspace / G-Suite MX Record to your DNS
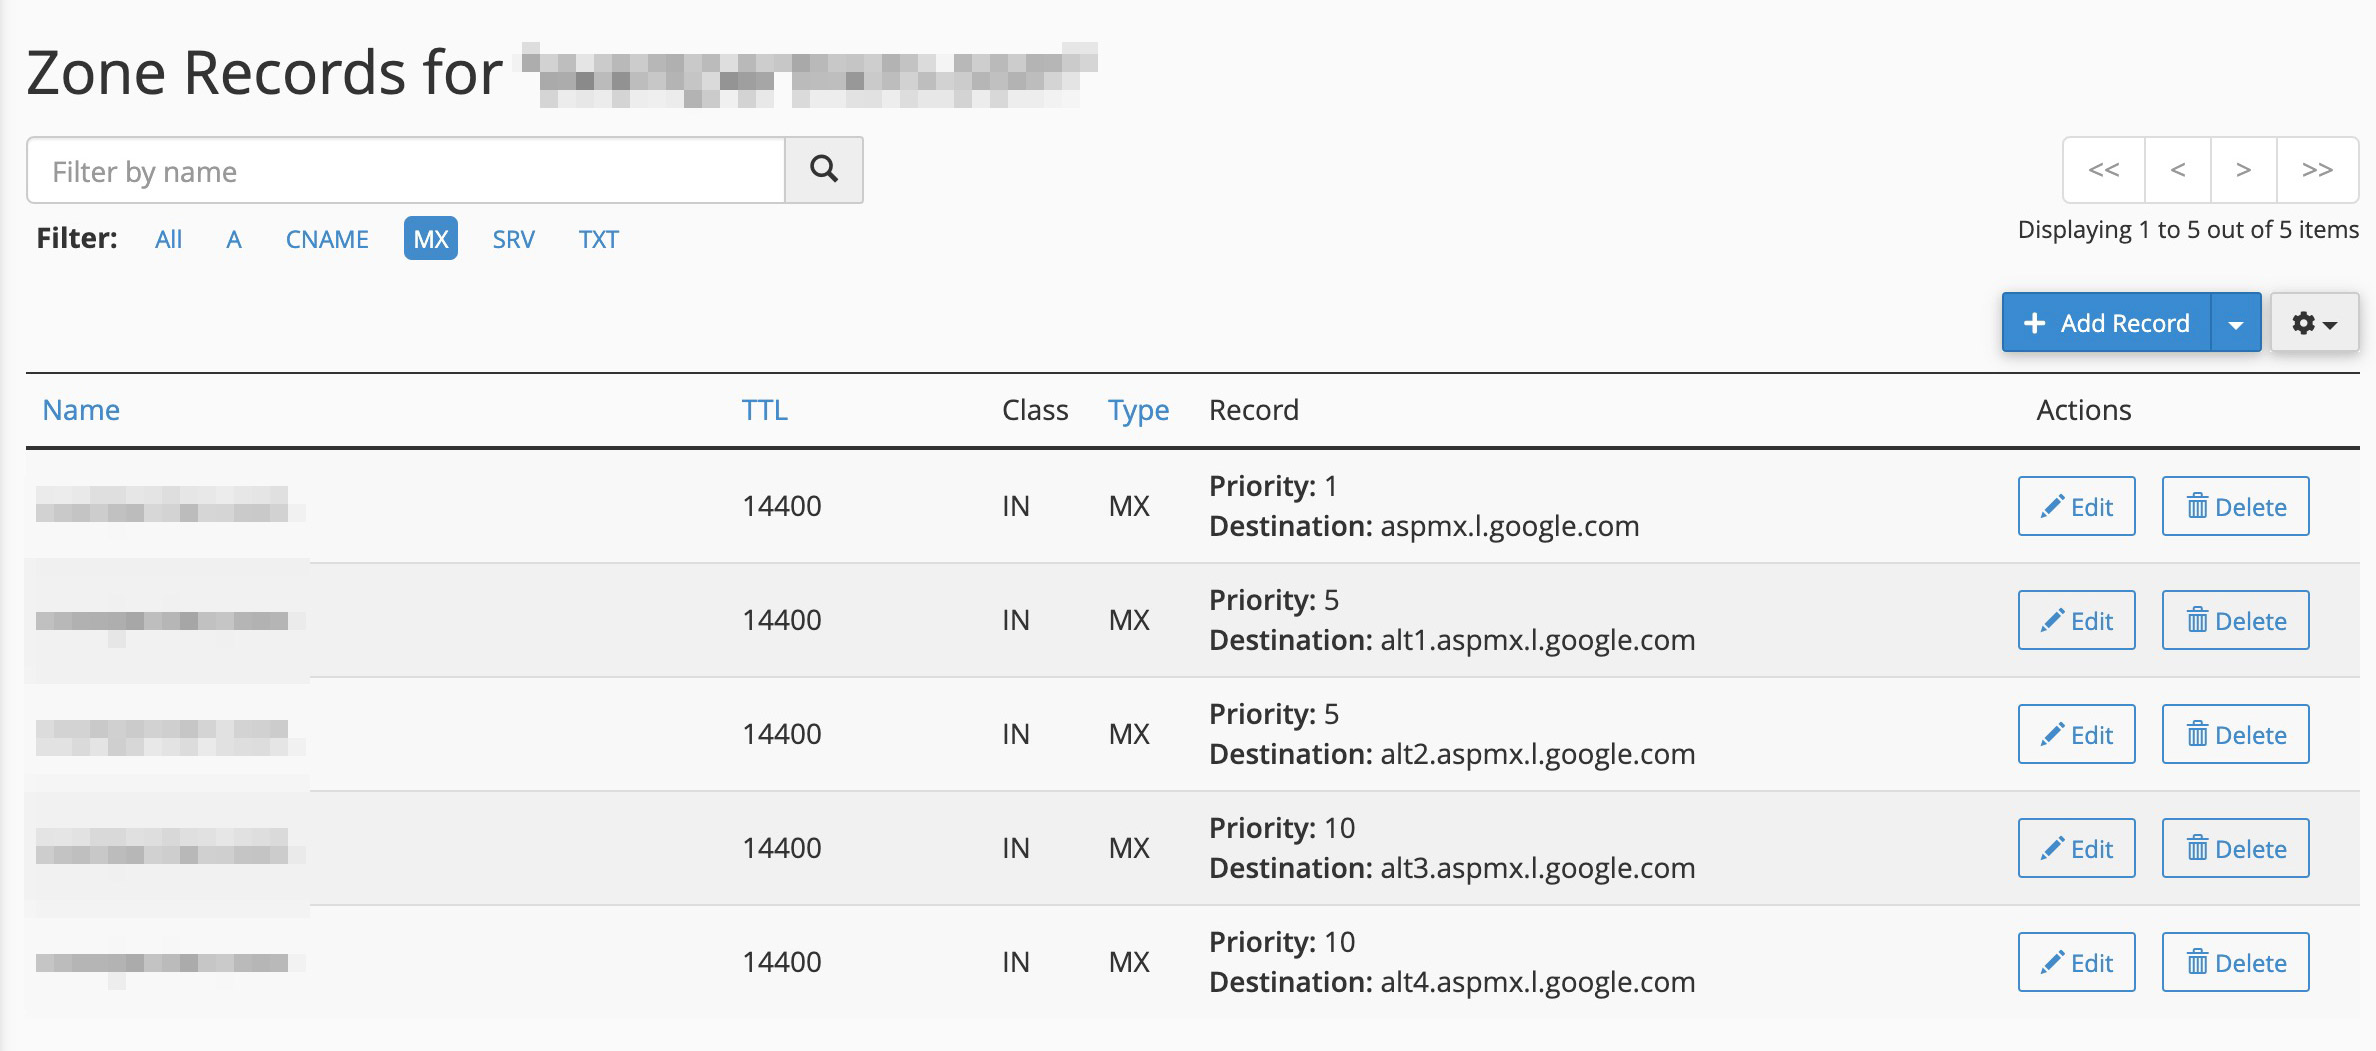
Add below 5 MX Record provided by Google Workspace / G Suite.
| Name | TTL | Type | Priority | Destination |
|---|---|---|---|---|
| Blank or @ | Default Value | MX | 1 | aspmx.l.google.com |
| Blank or @ | Default Value | MX | 5 | alt1.aspmx.l.google.com |
| Blank or @ | Default Value | MX | 5 | alt2.aspmx.l.google.com |
| Blank or @ | Default Value | MX | 10 | alt3.aspmx.l.google.com |
| Blank or @ | Default Value | MX | 10 | alt4.aspmx.l.google.com |
Example
As soon as the records on DNS are saved, all of your emails from your own domain will be transferred through Google Workspace / G Suite and landed on your Gmail inbox.